ONE of my favorite things to do is make color pop in photos. It doesn't take a genius, but it does take Photoshop and a well-exposed picture to begin. There are so many ways to do this in Photoshop – it’s such an amazing and robust tool – and I’m going to show a couple different ways to easily pop color in your portraits.
Before I begin let me take a moment to let you know that this is one of several ways to do this. In Photoshop there’s no ‘right’ way, which is what I also believe when it comes to photos – sometimes an ‘oops’ shot can become the most artistic, magical picture out of the whole batch. I believe photography is an art and there’s no right way or wrong way per say, just YOUR way. That’s what makes it artistic and fun. Ok, I digress…back to the tip.
Make your color pop: Photoshop tutorial #1I’m going to use this photo:
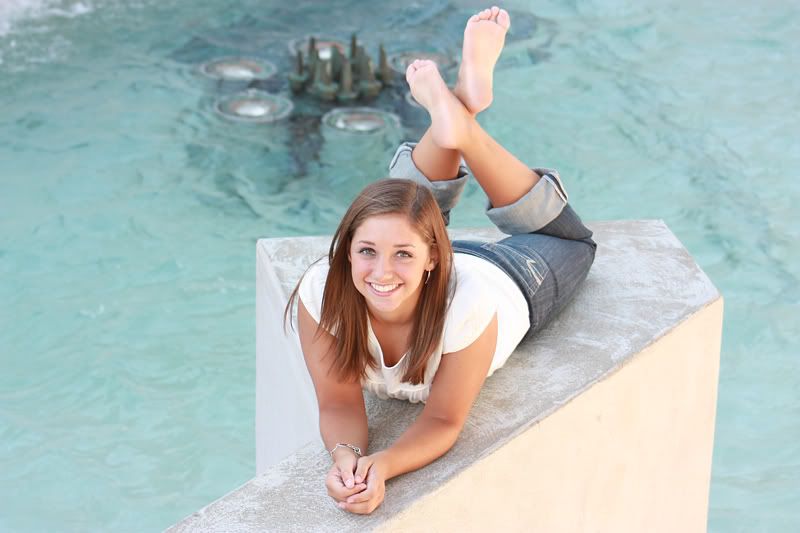
I love how soft the color is straight from the camera, but let’s see if we can give it a bit more punch.
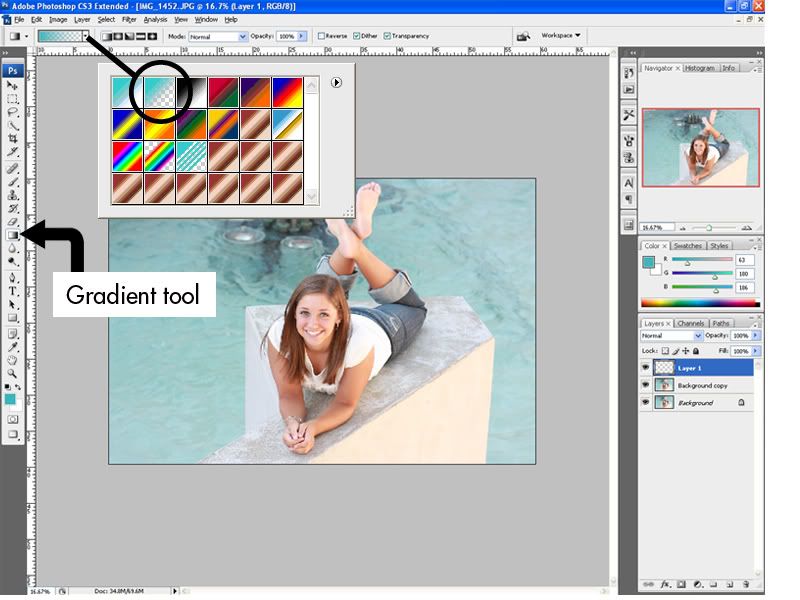
First, copy the background layer by dragging it to the ‘create new layer’ icon next to the little trash can. I always copy the background layer when I do anything in Photoshop so I always have the original still there, just in case I completely screw up. Then create a new blank layer by clicking that same ‘create new layer’ icon. You will end up with three layers, two of your original picture and one blank layer on top. Easy enough to start right?

Select your blank layer, then choose your gradient tool. From the color area you want to enhance, select a rich color from your palette that matches and choose white for your background color. In this photo, I choose a rich teal color because I want to bring out the teal in the water color. Go to your gradient palette and select the second option that goes from your main color to transparent.
Next spread your gradient over the portion of the photo you want to enhance.
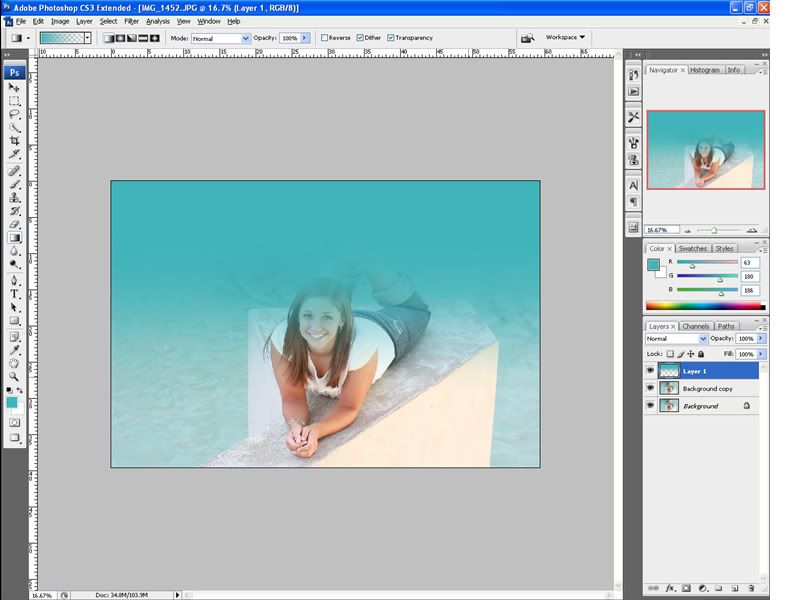
In your layers tab, select Overlay. Why use Overlay? Well, it enhances the blacks and heightens the contrast in your color, giving it that color pop that we’re going for.
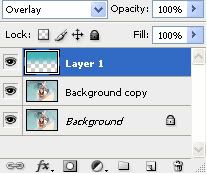
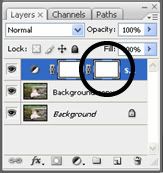
Now select your gradient layer and add a layer mask by selecting the box with the circle in it. Make sure your palette is now black and white.
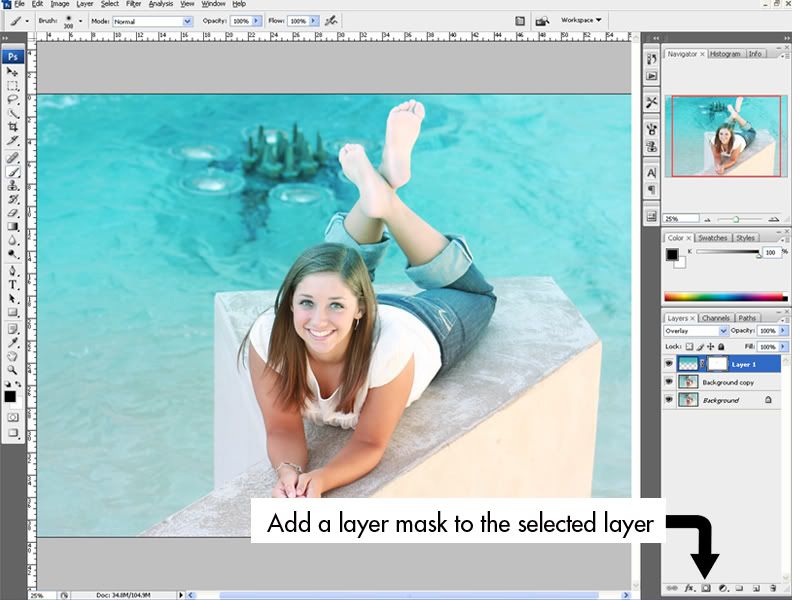
Use your brush size, brush hardness and opacity to erase the areas you don’t want affected by the Overlay.
Here’s a trick I learned a while ago that I use all the time – that’s especially helpful in doing this: click your backslash key to show you what you’ve erased. It will show you in red the areas you’ve covered or ‘brushed.’
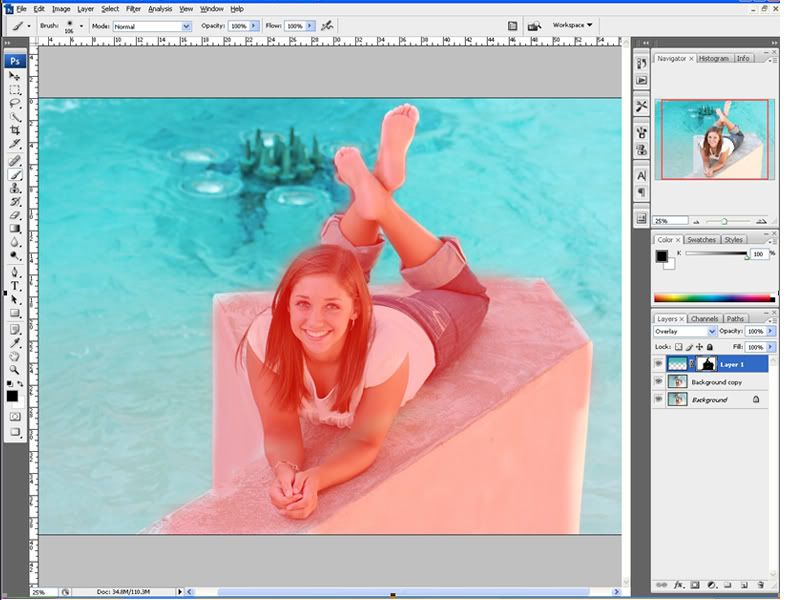
Now hit that backslash again and whala!
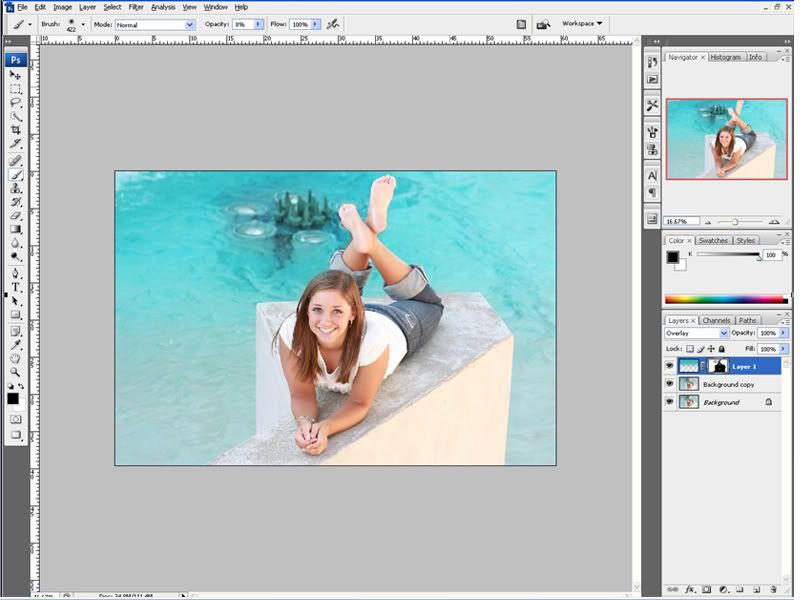
Now adjust the opacity on your gradient layer to taste. It still looks a little fake to me so I’m going to tone that down to about 60% for this photo.
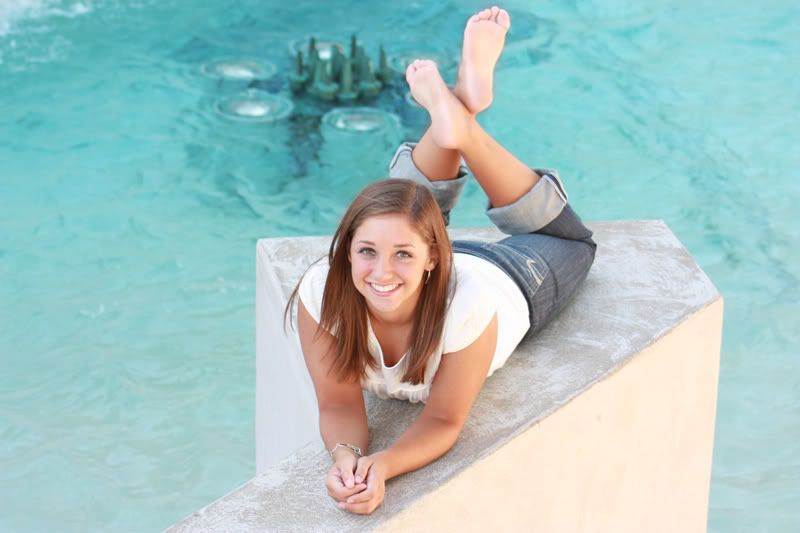
Check out the before…I think it’s a pretty nice picture out of the camera.
And after...POP! The color looks as pretty as the ocean and totally helps the subject pop. Man I’m ready for a trip to the Carribean after this one!
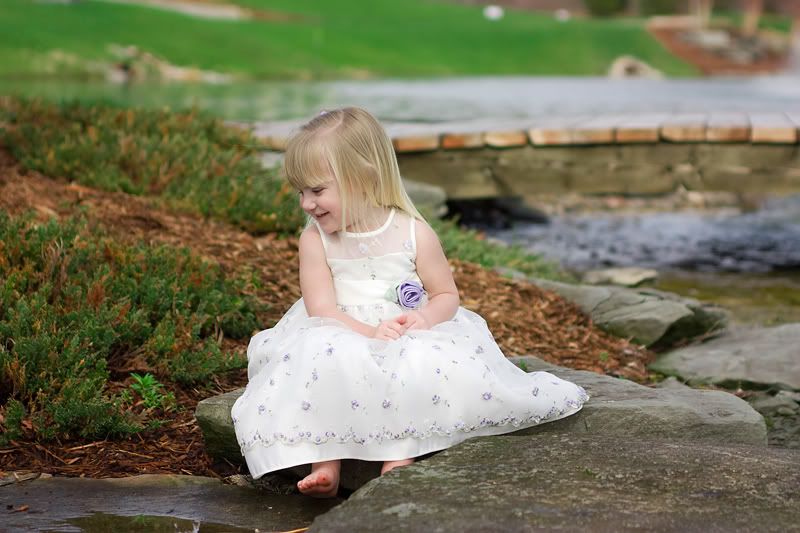
Make your color pop: Photoshop tutorial #2What if the background in your photo isn’t so even-toned? Like this one:
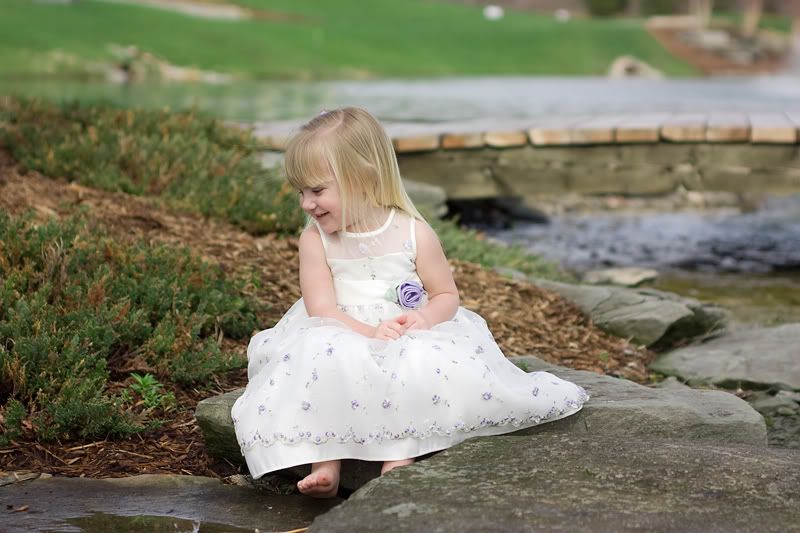
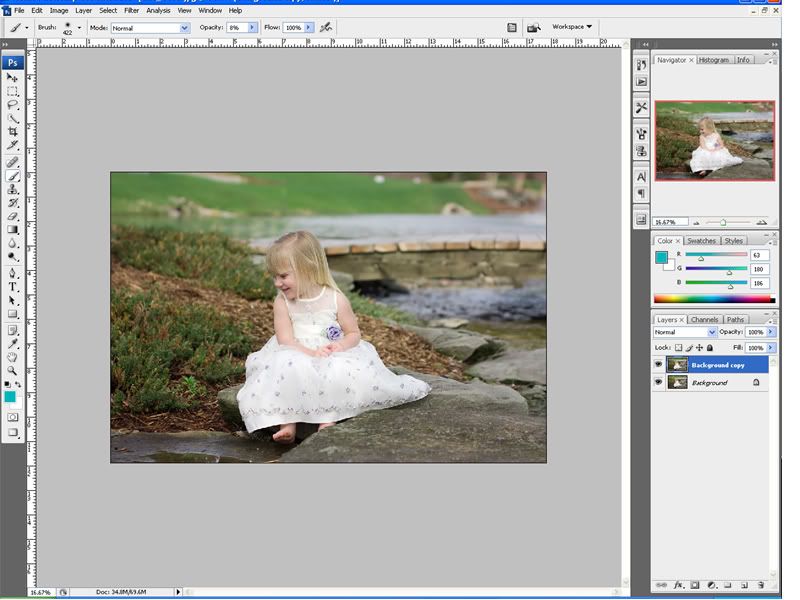
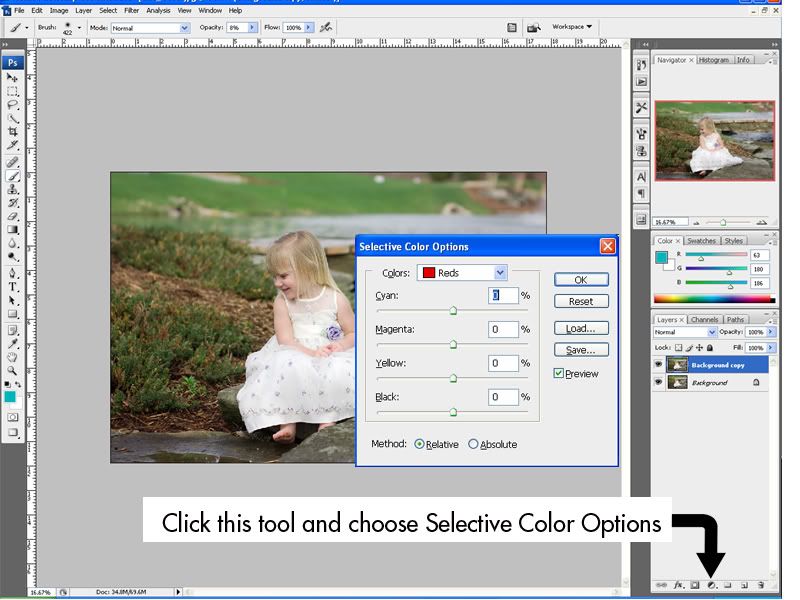
Here’s another way to give some dimension and color to your photo. First copy the background layer, just like you did in the tutorial above. To pop color in these types of photos, I like to use the Selective Color tool. In the black and white circle in your layers tab, choose Selective Color.
I like to give the greens, blues, yellows and cyans a little punch. Play around and move the slider to your taste. I like to stay away from the reds for portraits. Adjusting the reds can do crazy things to skin tones. When adjusting the colors keep an eye on your subject and adjust the colors accordingly. In most pictures you should be able to adjust most of the colors without distorting the skin color. Here’s an after of the same photo after adjusting the greens, yellows and neutral in the Selective Color Options.
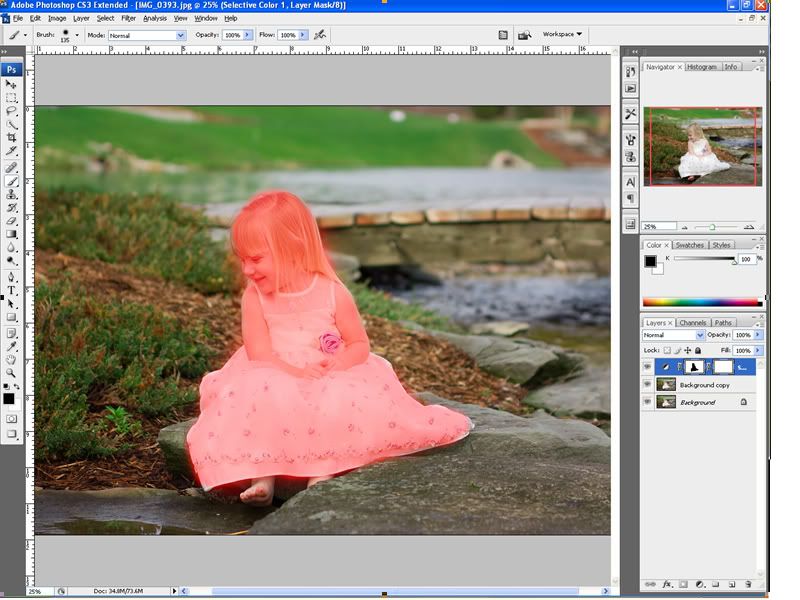
If you have a photo where you can’t adjust the color options without affecting skin tones, here’s what you can do. I will bump up the reds for demonstration purposes only to get the skin tone out of whack. Here’s what it looks like – the background looks ok, but our cute little subject looks like she has a serious sunburn.

Select your Selective Color layer in your layers tab and add a mask by clicking on the square with the circle in it at the bottom of the layers tab. A new layer will be linked to that one:
Make sure your main color is set to black and the background color is white, then use your brush tool to ‘erase’ the Selective Color over your subject.Use your backslash key to see your brush strokes in red.
Use backslash again to view your new picture. Here’s the before one more time:
And the after: